

Hook this cow free amigurumi crochet pattern on Ravelry here.
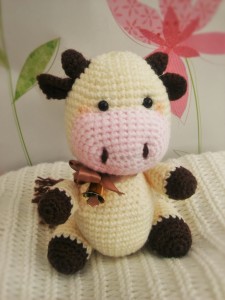
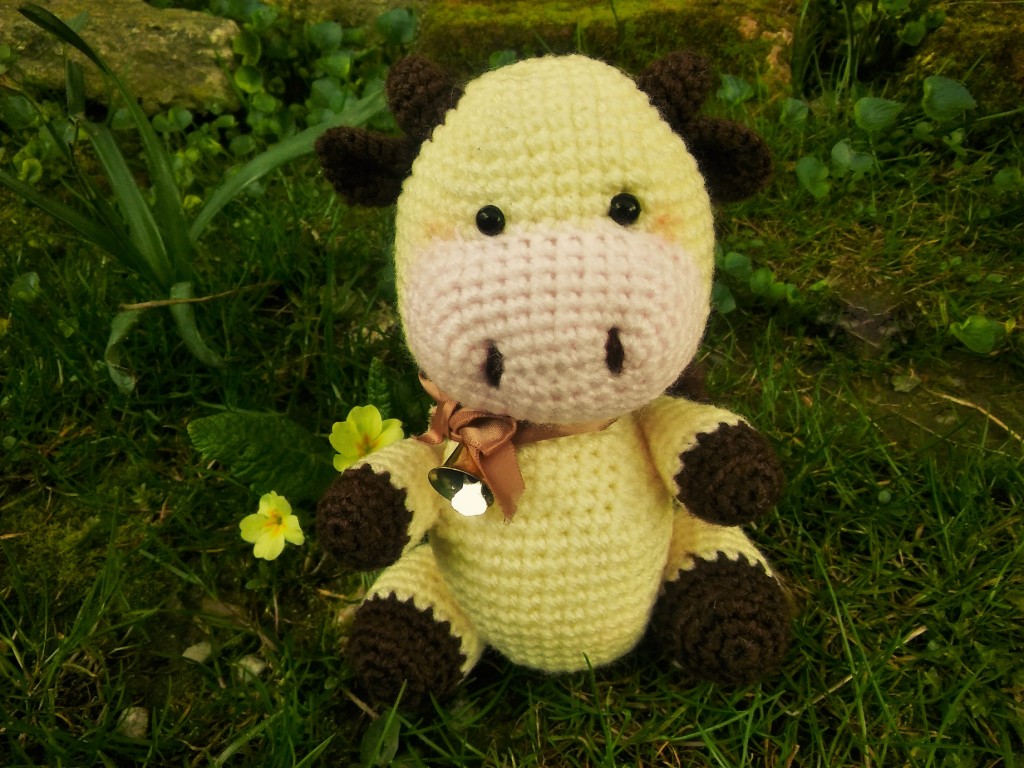
This little cow is called Candy, she is 13cm(5 inches) tall and you don’t have to be very experienced in crocheting to make her. All you need is:
- amiurumi making experience: Advanced Beginner
- some basic sewing skills
- crochet hook 3mm
- crochet hook 2,5mm (just the horns and the ears)
- Aran weight yarn in three different colors (I used Red Heart Niki)
- stuffing
- tapestry needle
- safety eyes (6mm)
- optional: some ribbon to tie around the neck
This pattern uses US terminology and these abbreviations:
- sc – single crochet
- ch – chain
- sc2inc – two single crochets in one stitch (single crochet increase)
- sc2tog – single crochet two stitches together (single crochet decrease)
- slst – slip stitch
- ML – magic loop, also known as magic ring or magic circle.
Let’s start! 🙂
The Body – from the bottom (use 3mm hook)
- 1. sc6 in ML (6)
- 2. sc2inc x 6 (12)
- 3. (sc, sc2inc) x 6 (18)
- 4. (sc2, sc2inc) x 6 (24)
- 5. (sc3, sc2inc) x 6 (30)
- 6. (sc4, sc2inc) x 6 (36)
- 7. (sc11, sc2inc) x 3 (39)
- 8. – 15. sc39 around (39)
- 16. (sc11, sc2tog) x 3 (36)
- 17. (sc10, sc2tog) x 3 (33)
- 18. (sc9, sc2tog) x 3 (30)
- 19. (sc8, sc2tog) x 3 (27)
- 20. (sc7, sc2tog) x 3 (24)
- 21. (sc6, sc2tog) x 3 (21)
- 22. (sc5, sc2tog) x 3 (18)
Slip stitch, fasten off and leave a long tale for sewing. Stuff the body.
The Head – work in oval
- 1. ch4 (4)
- 2. in 2nd chain from hook sc2inc, sc, sc3inc, sc1, sc1 in the same chain you did sc2inc (8)
- 3. sc3inc (in the first stitch of sc2inc you made in 2nd row), sc3, sc3inc, sc3 (12)
- 4. sc2inc, sc, sc2inc, sc3, sc2inc, sc, sc2inc, sc3 (16)
- 5. sc2inc, sc3, sc2inc, sc3, sc2inc, sc3, sc2inc, sc3 (20)
- 6. sc2inc, sc5, sc2inc, sc3, sc2inc, sc5, sc2inc, sc3 (24)
- 7. sc2inc, sc7, sc2inc, sc3, sc2inc, sc7, sc2inc, sc3 (28)
- 8. sc, sc2inc, sc7, sc2inc, sc5, sc2inc, sc7, sc2inc, sc4 (32)
- 9. sc2, sc2inc, sc7, sc2inc, sc7, sc2inc, sc7, sc2inc, sc5 (36)
- 10. sc3, sc2inc, sc3, sc2inc, sc3, sc2inc, sc9, sc2inc, sc3, sc2inc, sc3, sc2inc, sc6 (42)
- 11. – 20. sc42 around (42)
- 21. (sc5, sc2tog) x 6 (36)
- 22. (sc4, sc2tog) x 6 (30)
- 23. (sc3, sc2tog) x 6 (24)
- 24. (sc2, sc2tog) x 6 (18)
Now is a good time to place the safety eyes. Mine are between rows 11 and 12, 6 stitches apart. You can stuff the head now.
- 25. (sc, sc2tog) x 6 (12)
- 26. sc2tog x 6 (6)
Close the head, and fasten off. Sew the head onto the body.
The Nose – work in oval
- 1. ch8 (8)
- 2. in 2nd chain from hook sc2inc, sc5, sc3inc, sc5, sc1 in the same chain you did sc2inc (16)
- 3. sc3inc (in the first stitch of sc2inc you made in 2nd row), sc7, sc3inc, sc7 (20)
- 4. (sc2inc, sc, sc2inc, sc7) x 2 (24)
- 5. (sc2inc, sc3, sc2inc, sc7) x 2 (28)
- 6. (sc2inc, sc5, sc2inc, sc7) x 2 (32)
- 7. (sc2inc, sc7, sc2inc, sc7) x 2 (36)
- 8. sc, sc2inc, sc7, sc2inc, sc9, sc2inc, sc7, sc2inc, sc8 (40)
Slip stitch, and fasten off. Leave a long tail for sewing. Sew the nose onto the head, but put some stuffing before you close it entirely.
The Legs – make two
- 1. sc6 in ML (6)
- 2. sc2inc x 6 (12)
- 3. (sc, sc2inc) x 6 (18)
- 4. sc18 in back loop only (18)
- 5. sc18 in both loops (18)
Use a different color.
- 6. – 10. sc18 around (18)
- 11. (sc4, sc2tog) x 3 (15)
- 12. (sc3, sc2tog) x 3 (12)
- 13. (sc2, sc2tog) x 3 (9) – putt some stuffing on the bottom.
- 14. (sc, sc2tog) x 3 (6)
- 15. sc6 around (6)
Close it, and fasten off. Leave a long tail for sewing. Make two legs.
The Front Legs – make two
- 1. sc6 in ML (6)
- 2. sc2inc x 6 (12)
- 3. sc12 in back loop only (12)
- 4. sc12 in both loops (12)
Use a different color.
- 5. – 9. sc12 around (12)
- 10. (sc2, sc2tog) x 3 (9) – putt some stuffing on the bottom.
- 11. (sc, sc2tog) x 3 (6)
- 12. sc6 around (6)
Close it, and fasten off. Leave a long tail for sewing.
The Horns – from the top, make two (use 2,5mm hook)
- 1. sc5 in ML (5)
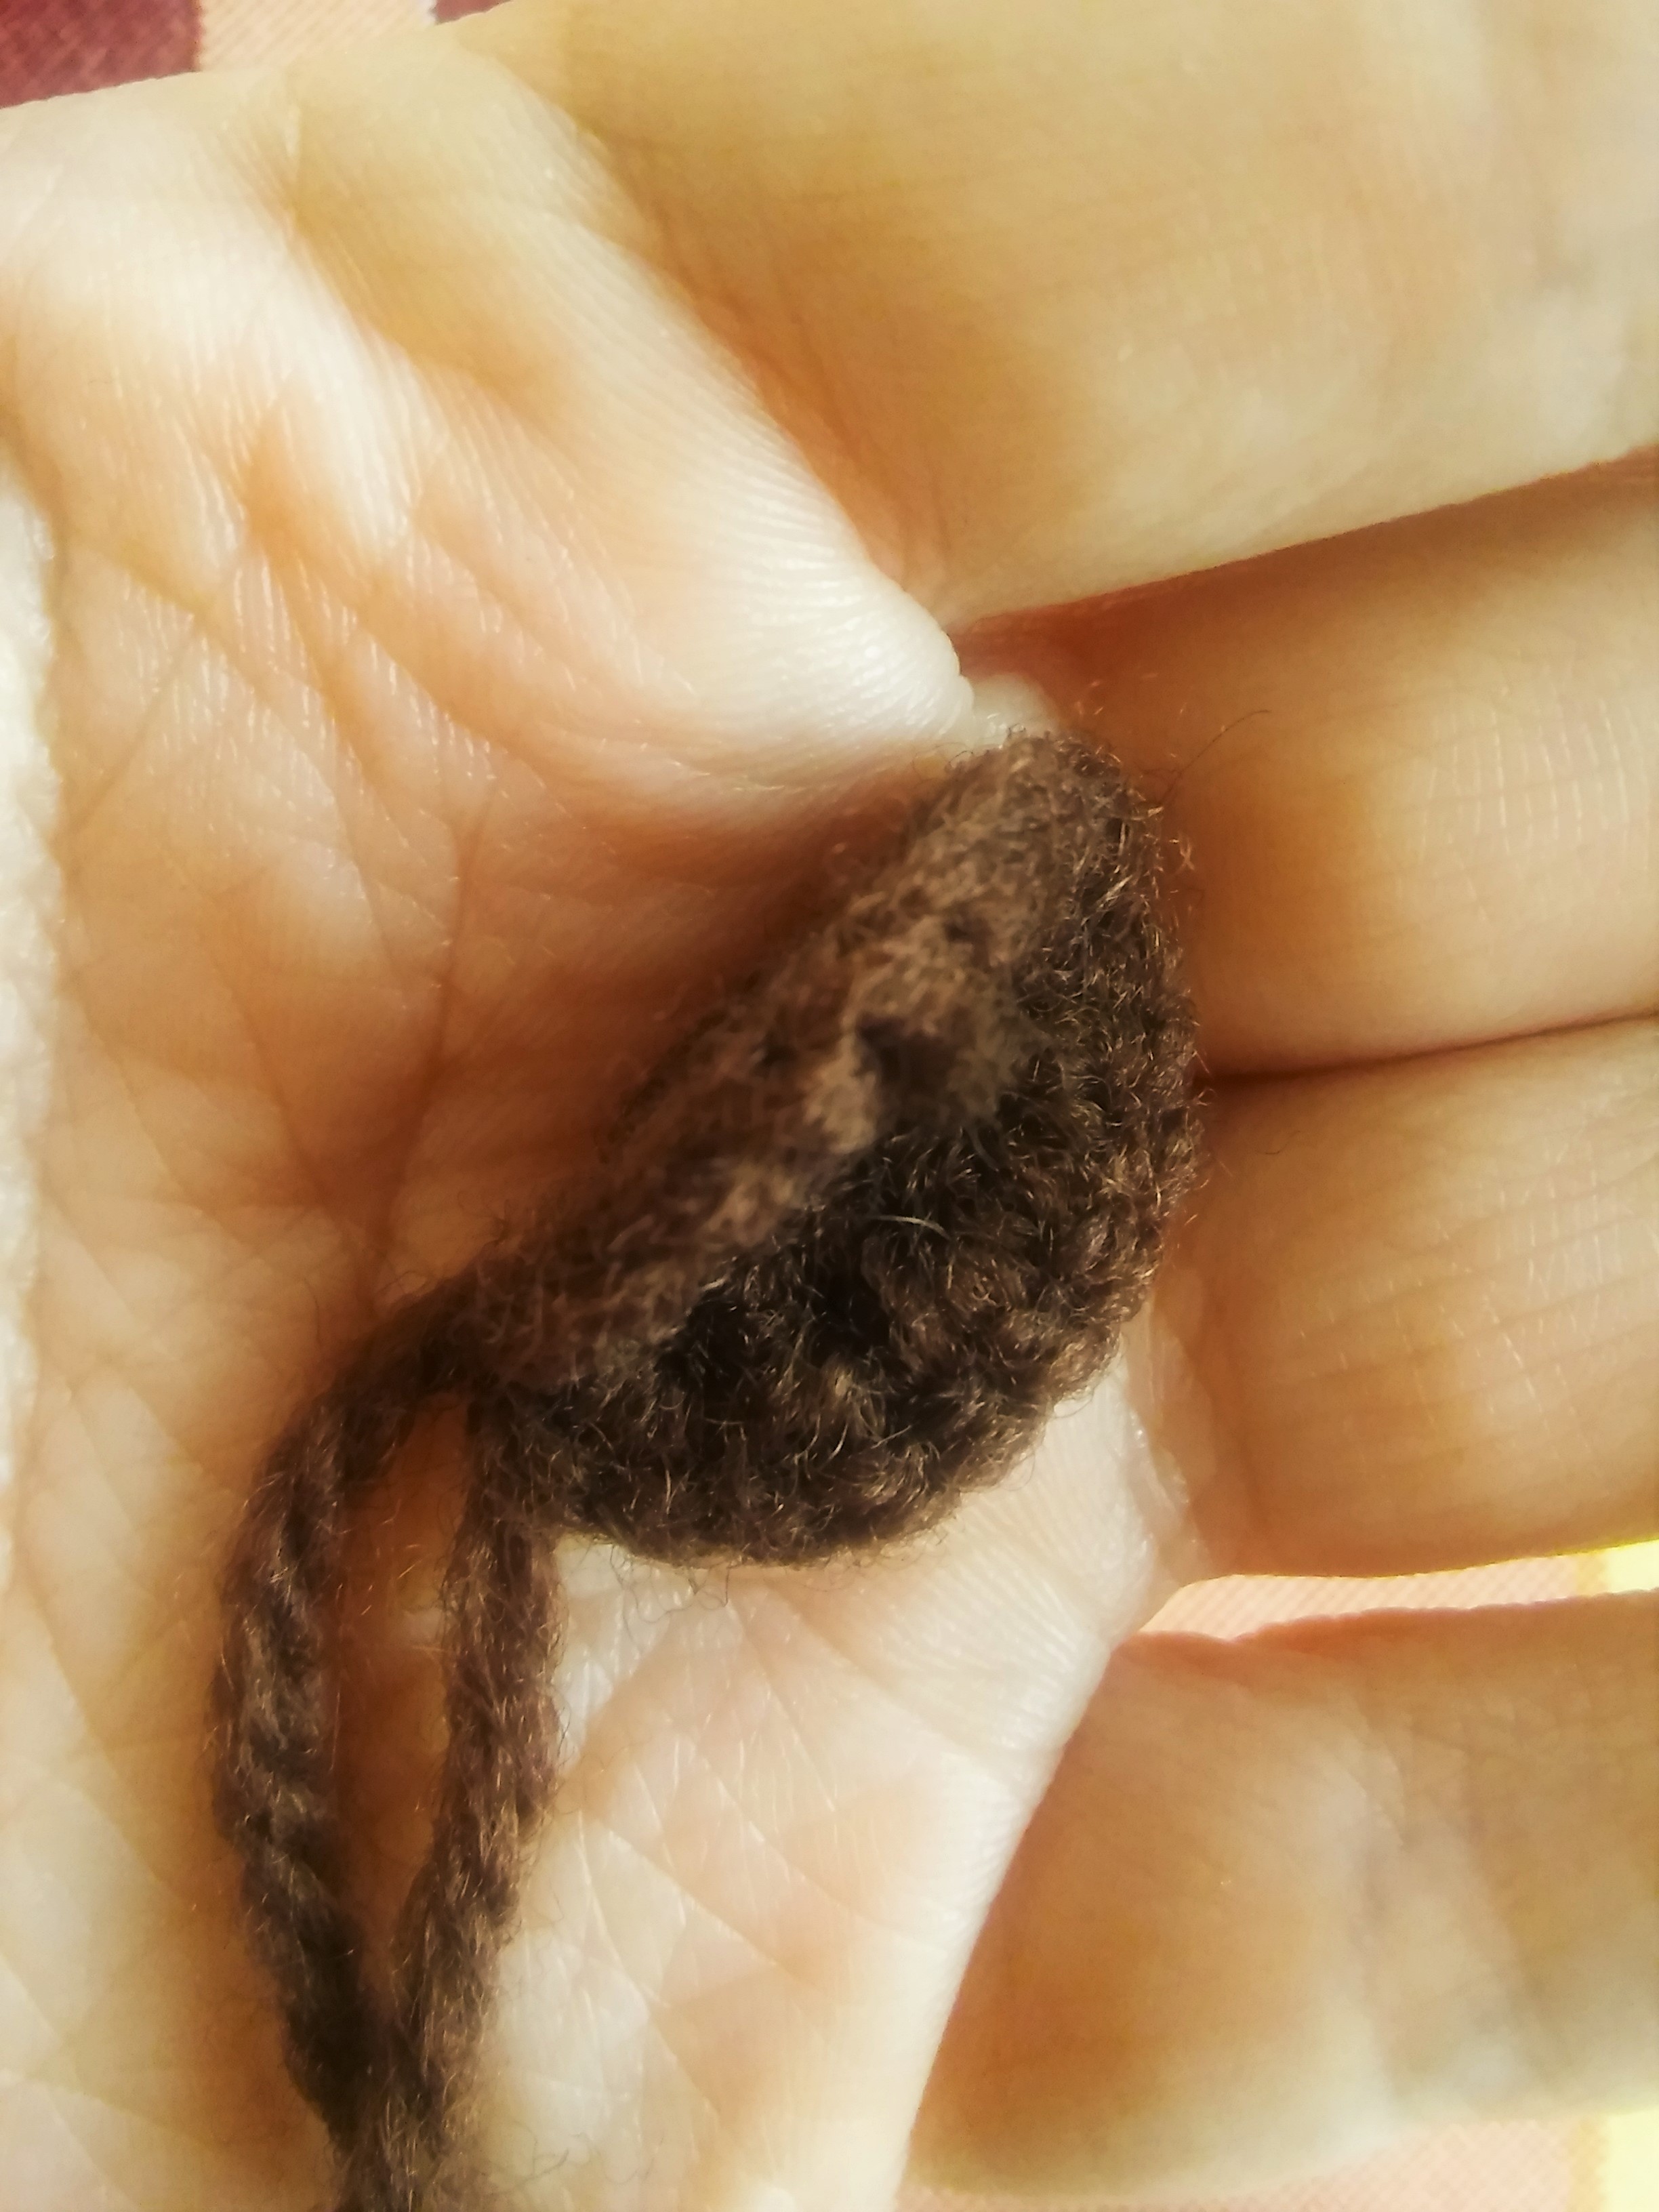
- 2. (sc2inc) x 3, sc2 (8)
- 3. sc3, sc2inc, sc4 (9)
- 4. – 5. sc9 around (9)
Slip stitch and fasten off. Leave a long tail for sewing.
Sew the horn onto the head somewhere between rows 5 and 10.
&n壯陽藥
bsp;
The Ears – make two (use 2,5mm hook)
- 1. sc5 in ML (5)
- 2. sc2inc x 5 (10)
- 3. (sc2inc) x 5, ch, (sc2inc) x 5 (21)
Slip stitch, fasten off and leave a long tail for sewing. Fold the ear to make a little crease. Sew it underneath the horn.
The Tail
Chain 11, starting in 2nd chain from hook, make 10 slip stitches until you reach the end of the chain. Fasten off and leave a long tail for sewing. Use some scrap yarn in different color and tie it in knots to the tail.
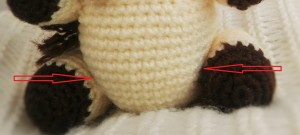
Before I attached the legs, I reshaped the body. I made the bottom part narrower by attaching piece of yarn to the body (in the place where the first leg should be), and puled it right trough to the other side (where the second leg should be). Than pulled it tight and tied it in knot.
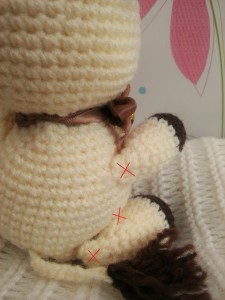
When attaching the legs, make sure you sew them onto the body in two places, as showed in the picture, marked with red crosses.
That’s it, your Candy the Cow is all done. Send me some pictures of her, I will gladly share them on my social media pages. If you need any help making it, find me HERE or leave your question in the comment section below.
As English is not my first language, there will always be some grammar mistakes. If you notice some of them, or you want to contribute in some other way, HERE is what you can do.
This pattern is copyright of Barbara Peček / TheMagicLoop.com . Please do not claim this pattern as your own. If you wish to share this pattern, you may link to this pattern but please do not reprint it on your site. Do not sell this pattern or parts of this pattern. You may sell finished items made from this pattern, but please clearly credit the design to me and provide a link to my blog www.themagicloop.com.


11 Comments
What a cute cow! Thank you!
thank you for your comment Lynne 🙂
Hey, so I’m doing your pattern, but I’m confused, when it says sc3inc, does it mean increase in 3 stitches around, or does it mean to put 3 stitches in one stitch?
Hi Alexa. It’s 3sc in one stitch. 🙂
Hi am new to this type of crochet, but love this little cow. am having trouble understanding the head, where it is crochet in oval for some reason I just cant get it right do you have any tips for me?
thank you
Try this video Hilary:
https://www.youtube.com/watch?v=_B9BinO3ULg
Really struggling with the horns, what do you mean by, work from the top?
The top meaning the pointy end of the horn. 🙂
OK I must be doing it wrong as mine look nothing like yours so I’ve improvised and made my own. But I now have one finished (not perfect) cow. Thanks for the pattern