

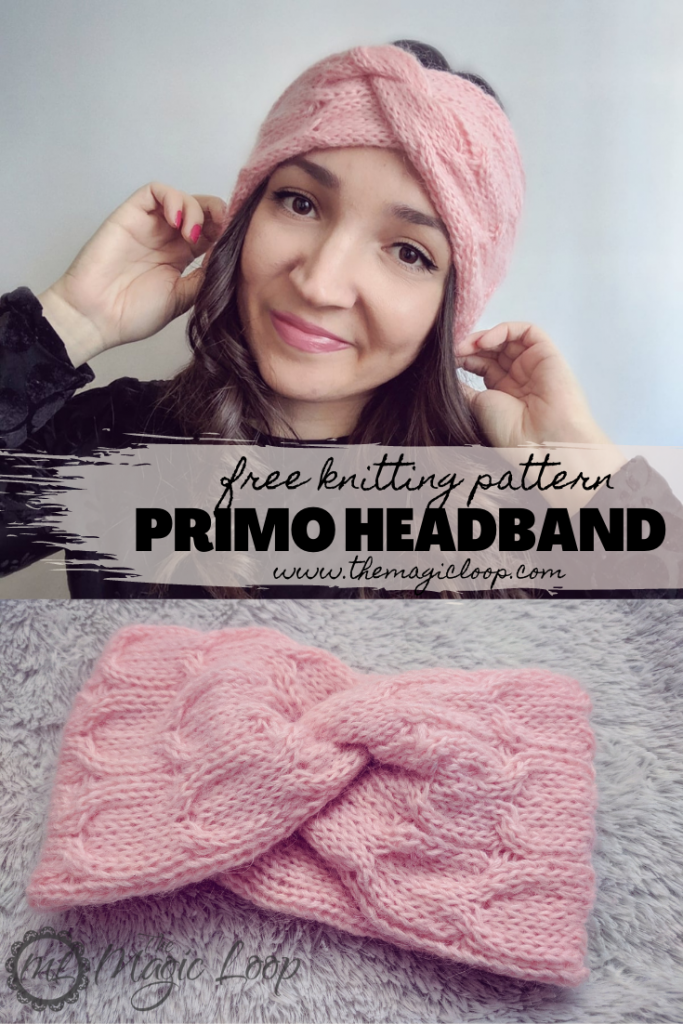
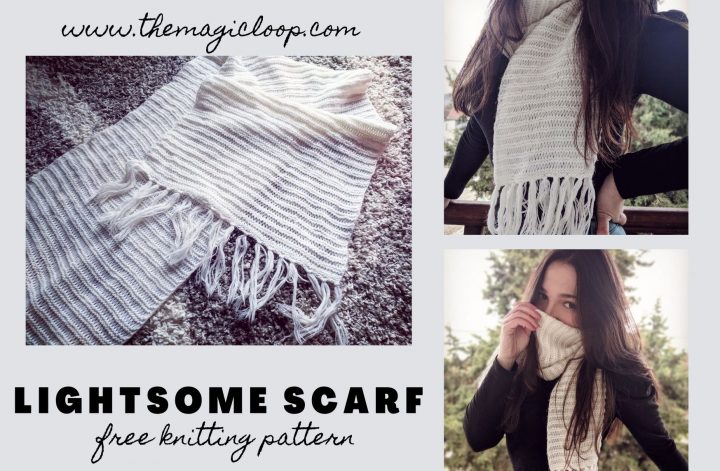
Perfect solution for us who don’t really like wearing hats but hate when our ears get cold is, of course, comfy knitted headband. Or is it better to call it an ear warmer? I found some pretty baby-pink mohair yarn and decided to try and finally make one. This is also my first try at writing a knitting pattern, so why not start with something simple?
You can hook this pattern on Ravelry by clicking here or Pin it for latter here!
Materials:
- 6mm (US 10) 16” circular needles
- any yarn asking for a 6mm (US 10) size needles, I used YarnArt Mohair Classic, two strands held together
- scissors and tapestry needle
- optional: cabling needle and stitch marker
Skills required:
- basic knit and purl stitches
- simple cabling
Abbrevations:
- K – knit
- P – purl
- 2/2 LC – Slip 2 stitches to cable needle and hold in front, K2, then K2 from cable needle
- 2/2 RC – Slip 2 stitches to cable needle and hold in back, K2, then K2 from cable needle
Gauge
16 stitches and 21 rows = 10 cm in stockinette stitch in the round
Let’s start!
Start by casting on 50 stitches (51 if you are using a method for joining in the round where you cast off the first stitch), and join to work in the round.
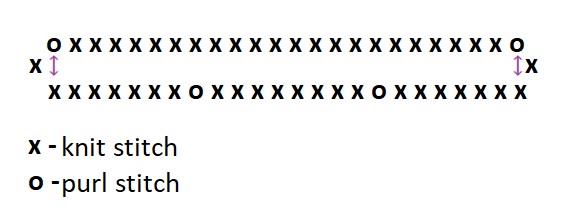
- K11, (P1, K8) x 3, P1, K11
Repeat 7 more times.
9. K11, P1, (LC 2/2, RC 2/2, P1) x 3, K11
Repeat rows 1 – 9 ten more times. Then do rows 1 – 8. Now you have 107 rows total on your needles, cast off.
Finishing
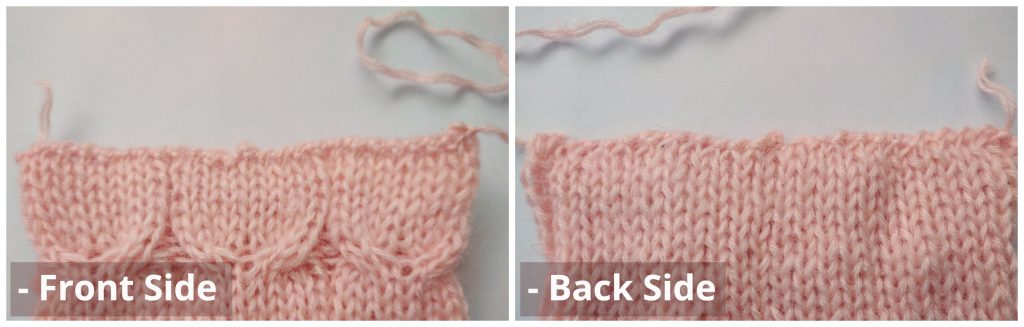
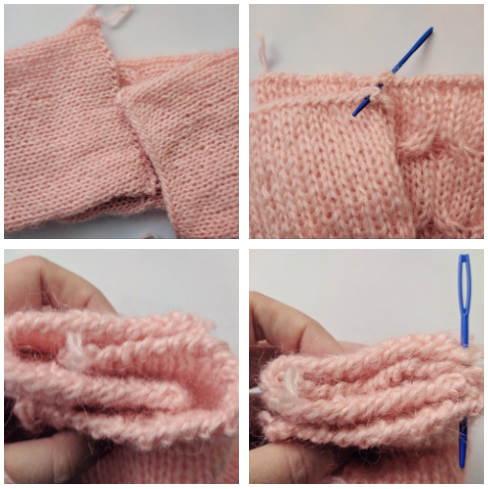
Sew shut the top and the bottom opening, The back side of the band includes two purl stitches and 22 knit stitches between them (total 24). The front side( the side with the cables) starts with the 2nd knit stitch from the first purl stitch and ends with the 7th knit stitch from the 3rd purl stitch. Leaving the first and last stitch of the cable side on the sides of the band. As shown in the photos below. Start by connecting the first purl stitch and the opposite knit stitch of the band.
Turn the back side up. Fold the band in half. Bring the edges closer together and turn one of the edges 180 degrees. Insert one edge into another. Now you have 4 layers that need to be stitched through.
That’s it! Your Primo Knitted Headband is done!
If you have any questions or comments, feel free to contact me in comments section of this post, on my Facebook page, or by email contact@themagicloop.com. Also, if you make Primo knitted headband, send me some pictures, I’ll publish them on my Facebook page. You can tag me on Instagram @themagicloop.
This pattern is copyright of Barbara Peček / TheMagicLoop.com . Please do not claim this pattern as your own. If you wish to share this pattern, you may link to this pattern but please do not reprint it on your site. Do not sell this pattern or parts of this pattern. You may sell finished items made from this pattern, but please clearly credit the design to me and provide a link to my website www.themagicloop.com.

1 Comment