
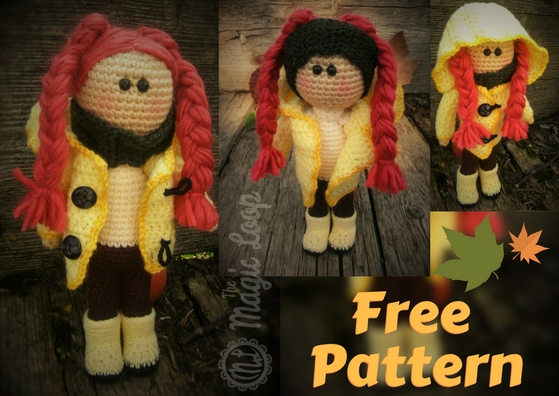
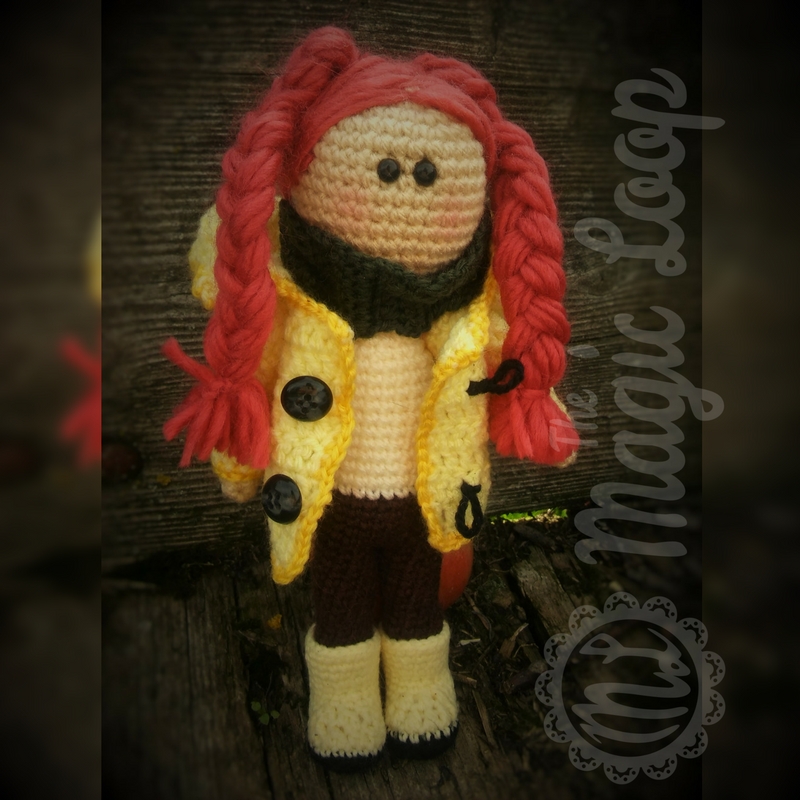
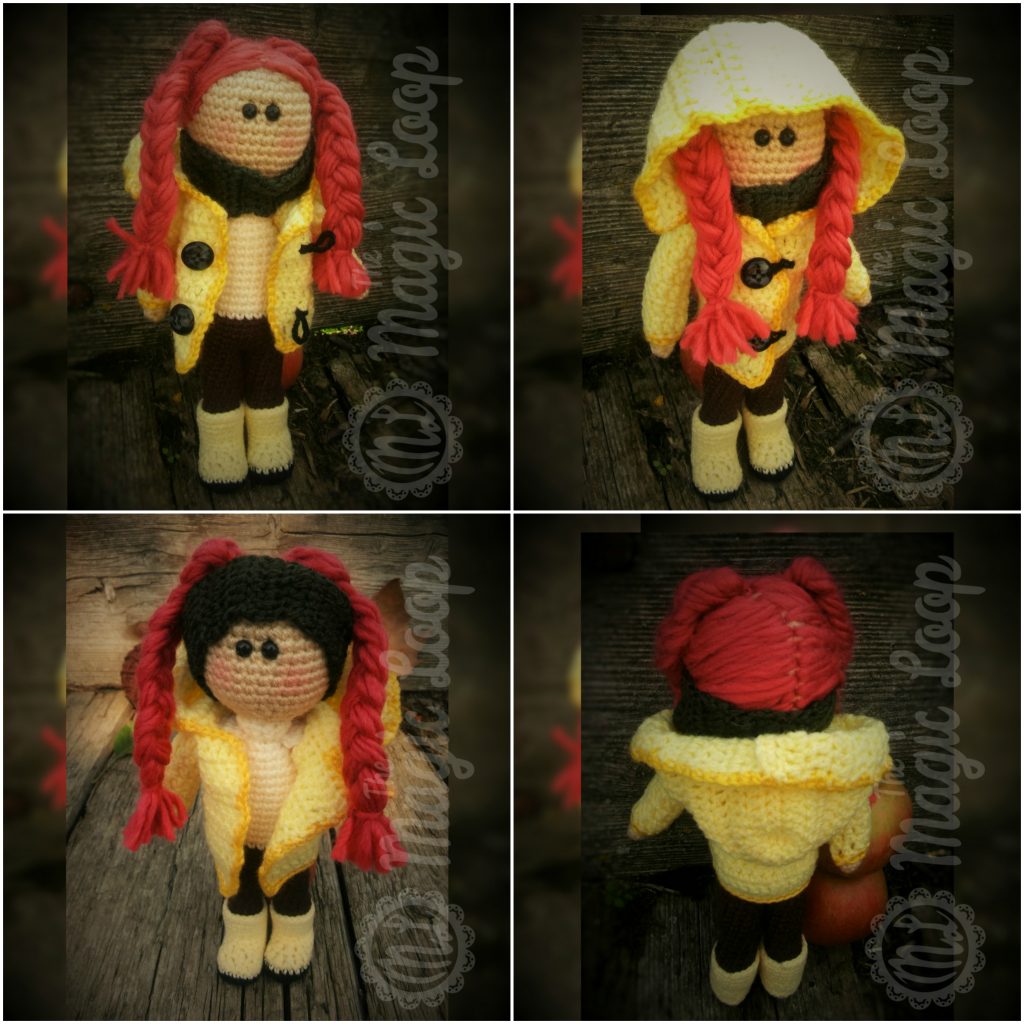
Hook this Autumn Doll pattern on Ravelry here!
This little redhead doll is autumn ready! Just look at her yellow raincoat and boots. She stands 22cm (8.7 inches) tall.
What you need?
- crochet hook 3mm (between US C and D)
- worsted weight yarn in many different colors
- tapestry needle
- Stuffing
- OPTIONAL: Safety eyes 6mm
- OPTIONAL: Buttons
This pattern uses US terminology and these abbreviations:
- sc – single crochet
- ch – chain
- sc2inc – two single crochets in one stitch (single crochet increase)
- sc2tog – single crochet two stitches together (single crochet decrease)
- slst – slip stitch
- hdc – half double crochet
- dc – double crochet
- dc2inc – double crochet increase
- dc2tog – double crochet decrease
- ML – magic loop/circle/ring
The Head
Worked in rounds from top. Don’t do the slipstitch after every row, just continue with the instructions.
1. 6sc in ML (6)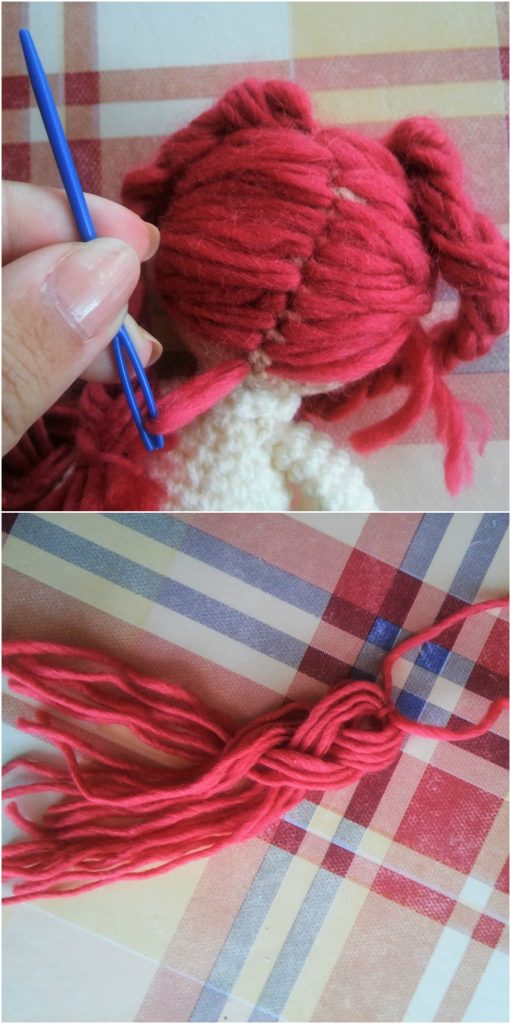
2. (sc2inc) x 6 (12)
3. (sc, sc2inc) x 6 (18)
4. (sc2, sc2inc) x 6 (24)
5. (sc3, sc2inc) x 6 (30)
6. (sc4, sc2inc) x 6 (36)
7. – 13. sc36 around (36)
Insert safety eyes.
14. (sc4, sc2tog) x 6 (30)
15. (sc3, sc2tog) x 6 (24)
16. (sc2, sc2tog) x 6 (18)
17. (sc, sc2tog) x 6 (12)
Stuff the head.
18. (sc2tog) x 6 (6)
Slipstitch and fasten off. Leave a long tail for sewing.
The Legs
Make two, worked from the bottom.
1. sc6 in ML (6)
2. sc2inc x 6 (12)
3.- 20. sc12 around (12)
When you make the first leg, cut the yarn, but don’t fasten off. Don’t cut the yarn after the second leg but keep working the rounds.
Figure 1 shows you how to join the legs. Insert your hook in the stitch no 1, right next to the last stitch you made in row 20. Yarn over and do single crochet.
21. sc12 on leg no 1 (from 1 to 12 green), starting from pink number 1, sc12 on the other leg. Your hook should now be in pink no 12. (24)
22. – 26. sc24 around (24)
Change colors and continue working the body.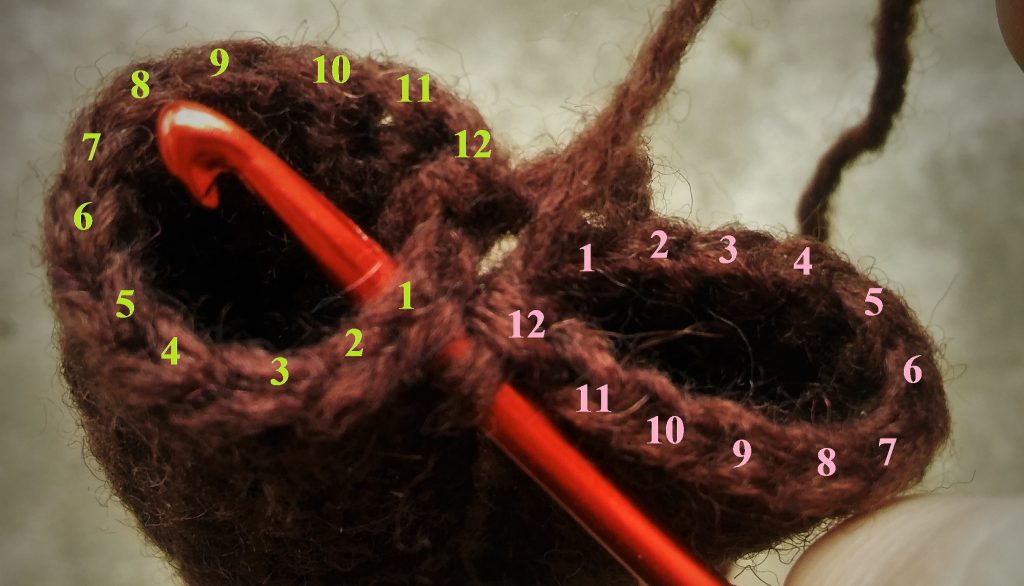 Figure1
The Body
1.-11. sc24 around (24)
12. (sc2, sc2tog) x 6 (18)
13. sc18 around (18)
14. sc2tog x 6 (12)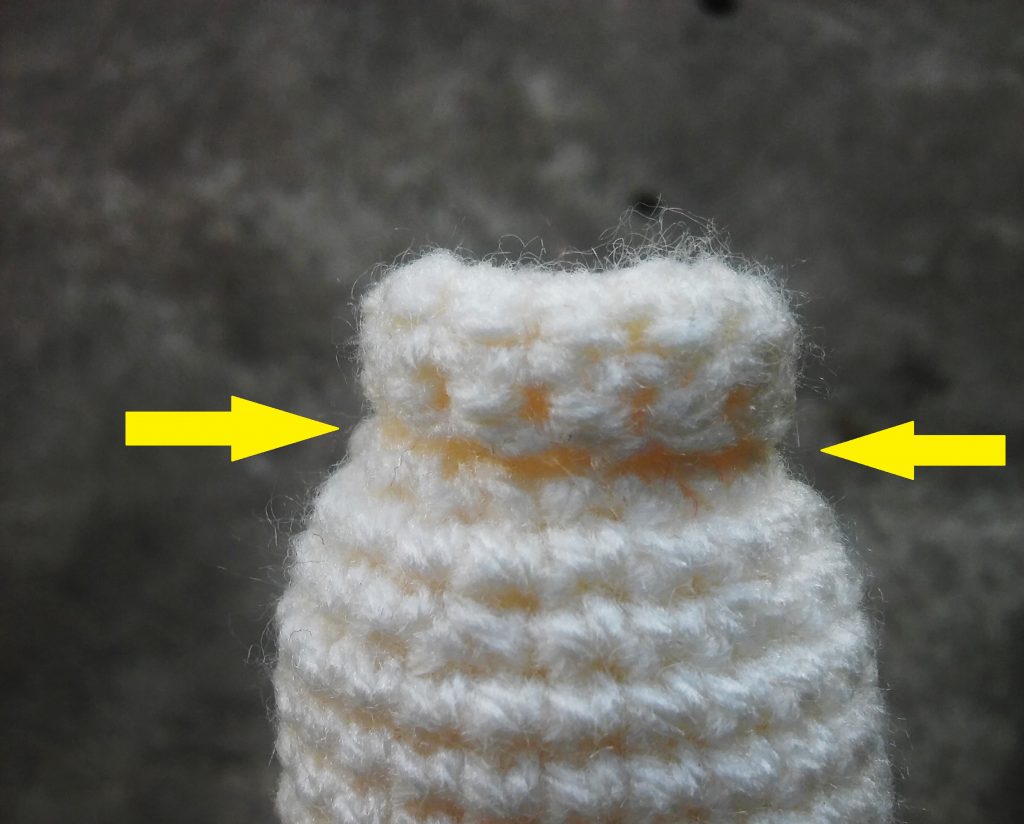
15.-18. sc12 around (12)
Fasten off and leave a long tail for sewing the head on.
Fold the last two rows over the 15th and 16th row to create a turtleneck. Sew the head on.
The Arms
Worked in the rounds from the bottom.
1. sc6 in ML (6)
2. sc2inc, sc5 (7)
3. sc2inc, sc6 (8)
4.-5. sc8 around (8)
Change colors.
6.-18. sc8 around (8)
19. sc2tog x 4 (4)
Fasten off and leave a long tail for sewing. Make two. Sew them right under the turtleneck, showed with the yellow arrows.
The Coat
Starting from the bottom.
1.ch30, ch3 more
2. starting from the 4th chain from the hook, dc30, ch3, turn (30)
3.-8. dc30, ch3, turn (30)
9. dc7, ch3, skip next 3 stitches(this creates holes), dc10, ch3, skip next 3, dc7, fasten off.
The hood is optional.
10. Ch4, skip the first 4 stitches of the 9th row, connect the chain to the coat by doing one sc in the 5th stitch, while the ch4 is still on the hook. Sc21 (when you get to the ch3 from previous row, sc3 in back loops only), stop 4 stitches from the end of the row. ch7.
11. Skip first 3 chains, dc4 on the chain, dc10, dc2inc x 2, dc10, dc4 on the chain, ch3, turn (32)
12. dc15, dc2inc x 2, dc15, ch3, turn (34)
13. dc16, dc2inc x 2, dc16, ch3, turn (36)
14. dc17, dc2inc x 2, dc17, ch3, turn (38)
15. dc17, dc2tog x 2, dc17, ch3, turn (36) – decreasing
16. dc16, dc2tog x 2, dc16, ch3, turn (34)
17. dc15, dc2tog x 2, dc15, ch3, turn (32)
18. dc14, dc2tog x 2, dc14, ch3, turn (30)
19. dc13, dc2tog x 2, dc13, fasten off and cut the yarn.
The Sleeves
Join yarn in the stitch marked with no 1.
1. ch3(this will stand for 1st dc), dc10, slst in 3rd ch from ch3 (11)
2. -7. ch3, dc10, slst.
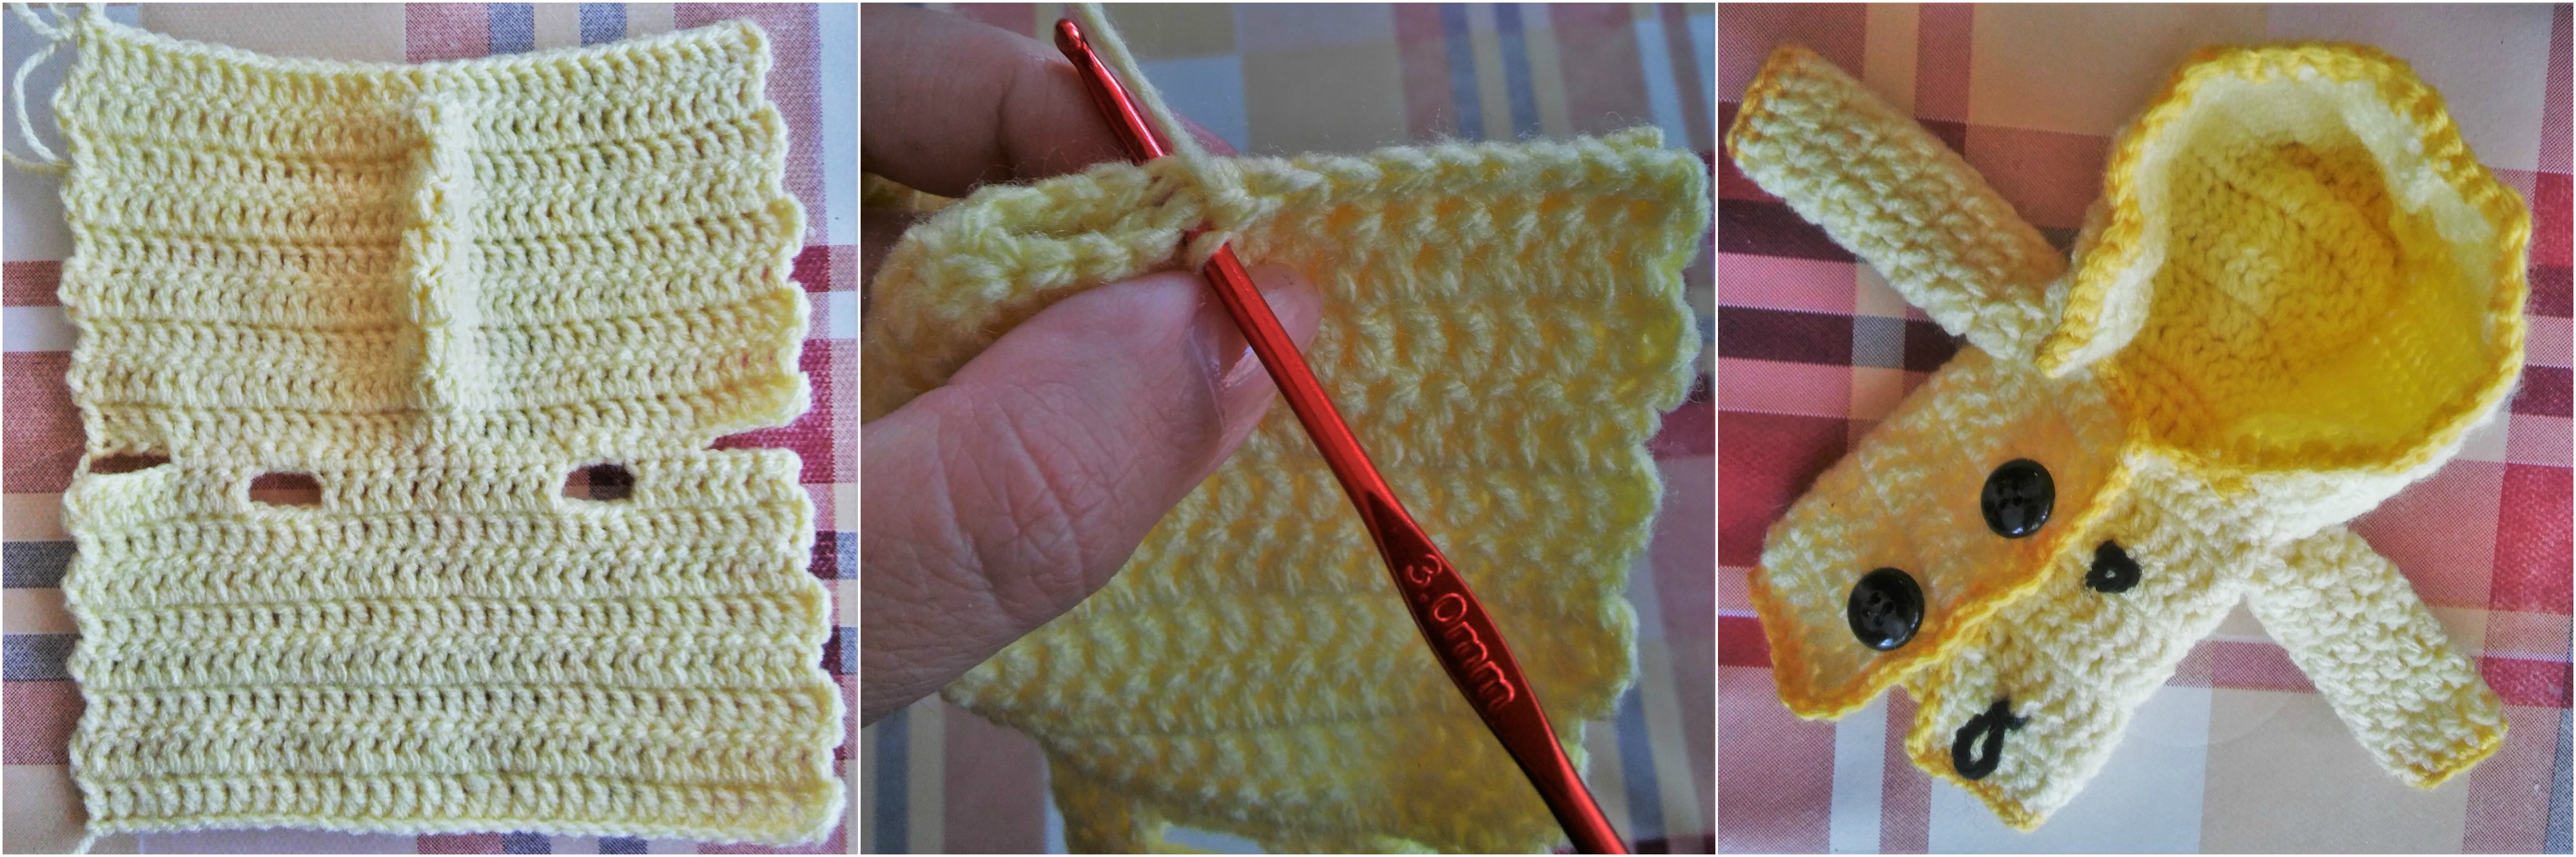
Fasten off. Finish the hood by sewing or crocheting together both ends of the row 19 (as shown on the middle picture below). Do a row of sc in different color around the coat. Add buttons.
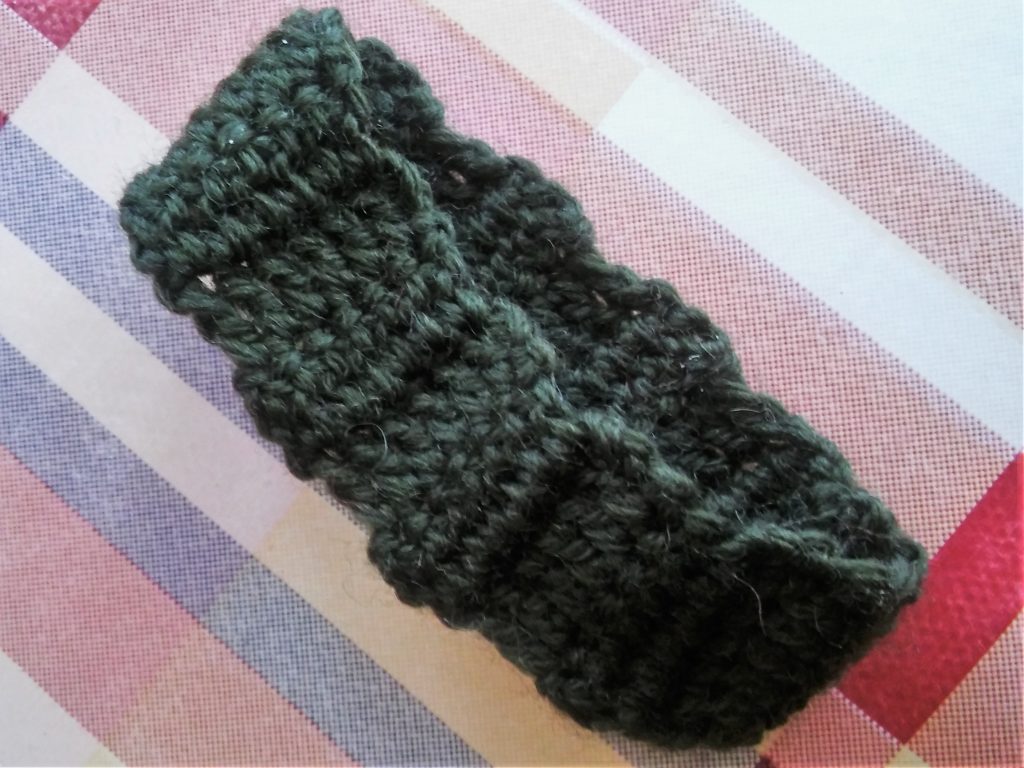
The Cowl/Headband
1. ch9
2. from 4th chain from hook dc6, ch3, turn (6)
3.-16. dc6, ch3, turn (6)
17. dc6, fasten off.
Join ends by sewing/crocheting them together.
The Boots
Starting with soles. Worked in ovals.
1. ch9
2. from 2nd chain from hook sc7, sc3inc in last chain, continue around, sc7, sc3inc in top chain. (20)
Now you have an oval with 3sc on both ends and 7sc on each side.
3. sc8, sc3inc, sc9, sc3inc (25)
4. sc6, hdc, dc3, dc3inc, dc4, hdc, sc6, sc3inc, sc1 (28)
Change colors.
5. back loop only, sc28 around (28)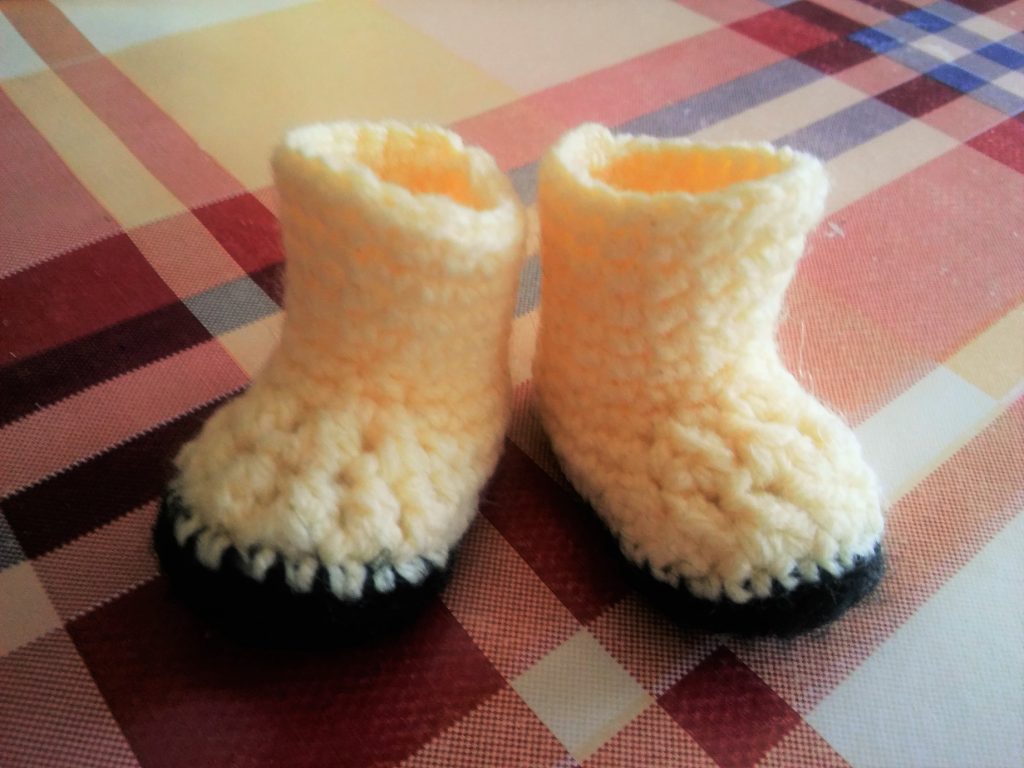
6. 6sc, dc2tog x 6, 10sc (22)
7. 6sc, dc2tog x 3, 7sc, sc2tog, sc1 (18)
8. sc18 around (18)
9. sc7, sc2tog, sc7, sc2tog (16)
10. sc16 around (16)
11. sc7, sc2inc x 2, sc7 (18)
12. sc18 around (18)
13. sc8, sc2inc x 2, sc8 (20)
14. sc20 around (20)
Fasten off.
If you have any questions or comments, feel free to contact me in comments section of this post, on my Facebook page, or by e-mail themagicloop.com@gmail.com. Also, if you make Autumn Doll, send me some pictures, I’ll publish them on my Facebook page. You can tag me on Instagram @barbarapecek.
You can support me by sharing this post or by buying my other patterns on Etsy or Ravelry. 🙂
This pattern is copyright of Barbara Peček / TheMagicLoop.com . Please do not claim this pattern as your own. If you wish to share this pattern, you may link to this pattern but please do not reprint it on your site. Do not sell this pattern or parts of this pattern. You may sell finished items made from this pattern, but please clearly credit the design to me and provide a link to my blog www.themagicloop.com.

14 Comments
Is there an error with the pattern for the boots? No matter what I do, I can’t get it to match up from the stitch count or the stitches from the previous rounday. Hope that makes sense.
Hi Erica! I can’t find any errors. I assume you use something like a stitch marker to mark the beginning of the rows so that’s why the stitch count doesn’t add up. In row No 2, the last sc3inc should be in the 9th chain from the row 2, which you skip in the beginning. In row No 3 last sc3inc should be in the middle sc of sc3inc you made in row No 2, so you have one stitch left! Row No 4 should start in that stitch.
I hope this makes sense 🙂 if not, I’ll take some step-by-step pictures. 🙂
Hi , do you have an tutorial for how to make the hair? i can’t figure out how you did it 🙂
No, sorry. I used a tapestry needle and one long strand of yarn…
Such a beautiful doll just started to crotchet her for my daughter and her friends which they all want different hair colour on dolls
Hi. I’m trying to do the hood, but after I can’t figure out how to do step 11. Am I supposed to do dc4 in one chain, and then dc10 in the next chain?
Thanks!
Hi Rachel. You did a ch7 in the row 10, you skipped first 3 chains, and than you should do one dc in every remaining chain (4 chains). Than continue by doing 10dc (one dc in every sc from the row 10), dc2inc x 2, again doing dc10, until you reach the chain. Dc in every chain (4chains).
Hope this helps 🙂
Thank you for sharing your beautiful doll pattern
Thank you so much for sharing this lovely pattern
THANK YOU I WILL BE MAKING THIS DOLL FOR A LITTLE GIRL AT CHURCH.
LOUISE